Morrowind Imperial Legion Questline Guide — Full Walkthrough
Everything you need to complete the Imperial Legion questline — ranks, quests, rewards, and the items worth grabbing along the way.

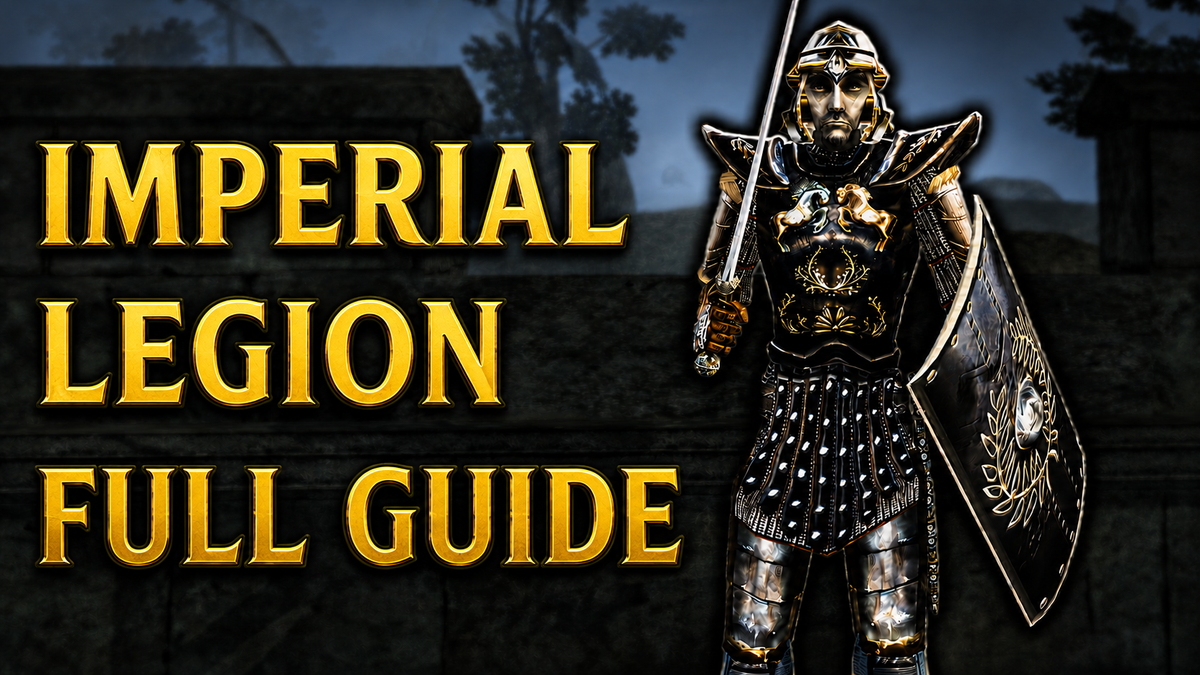
Full Video Walkthrough of the Imperial Legion Faction Questline
The video covers it all — this guide has the routes, rewards, and missable items laid out for easy reference while you play.
Overview
The Imperial Legion is the Empire's military arm in Vvardenfell. In practice that means they're the ones keeping order in towns like Caldera and Dagon Fel, collecting taxes, and generally making themselves useful while the Dunmer great houses quietly resent their presence. It's not the most glamorous outfit on the island, but it's one of the most rewarding questlines to run.
You'll work your way up through the ranks under five different commanders spread across four forts, doing everything from solving a murder in a kwama egg mine to escorting a disgraced knight out of Vivec through the sewers. The quests are varied enough to stay interesting, and the final two artifacts you walk away with — Chrysamere and the Lord's Mail — are genuinely among the best items in the game.
One thing to know before you start: once you join, you need to wear a Legion cuirass whenever you speak to any Legion member of equal or higher rank. Only the cuirass slot matters — the rest of your armor can be whatever you want. If you forget and try to talk to a superior out of uniform, they'll refuse to speak with you. The game doesn't explain this very well, so now you know.
Ranks & Advancement
Quest Walkthrough
Widow Vabdas' Deed
Your first assignment sounds straightforward enough: General Darius wants you to get a land deed from a widow named Vabdas. The Legion needs her land for a new dock, and Darius makes it clear he's not interested in hearing no for an answer.
Head west from the Tradehouse following the shoreline and you'll find her small house. She won't hand over the deed, and she's got a reason — she says her husband was murdered by a legionnaire when he went to the egg mine looking for kwama eggs for his family.
That's worth looking into. Head to the egg mine east of town, up the hill and across the bridge. The guard on duty will give you a key since you're a member of the Legion. Inside, stay on the first floor heading east and follow the signs marked "danger" down to the lower mine. Two things to know before you go further: Lugrub gro-Ogdum is down here, and he'll attack you on sight if you don't leave within ten seconds — so be ready. The Kwama Queen is here too. Don't touch her; you'll need her for the next quest.
Keep exploring until you find the underground stream. The ghost of Mansilamat Vabdas is waiting there, and he confirms his wife's story — Lugrub killed him and threw the murder weapon into the pool. Dive in, swim down to the pillar at the bottom, and pick up the axe. That's your evidence.
Return to Darius, show him the axe, and Lugrub is declared an outlaw. Go back and deal with him — the orc himself isn't too tough, but watch out for the kwama warriors nearby. Their magic spells hit hard and they'll join the fight if you're not careful. Stay close to the door and pull Lugrub back to you rather than chasing him into the room.
Reward: Imperial Broadsword + promotion to Spearman (Imperial Shield)
Cure the Kwama Queen
The mine is still closed — the Kwama Queen is infected with blight disease and needs to be cured before the miners can get back to work. Darius sends you to sort it out.
You have two options for the cure. The straightforward one: speak with Hetman Abelmawia near the Temple entrance in Gnisis and pick up some scrolls of cure blight. But there's a much better way. Head into the Gnisis Temple, turn left, and speak with the priest. Buy two potions of cure disease. Go up to the second floor and find the shrine — it looks like a carved pillar. Donate both potions to the shrine, then click it again to reveal a hidden mask. Click the mask and a spell called Vivec's Touch will appear in your spellbook. It cures both common disease and blight on touch. This spell usually costs around 900 gold to purchase; you're getting it for the price of two potions. Whether the developers put this here intentionally for this exact quest or it's a coincidence, I honestly don't know, but either way — use it.
Back in the mine, make your way to the Queen's Chamber in the lower level. The kwama warriors guarding her can actually be quite tough at low levels. If you can't beat them, you don't have to — you can run past them, cast the cure on the Queen, and get out. The quest completes either way.
Reward: 100 gold
Rescue Madura Seran
A pilgrim named Madura Seran has been taken hostage by Ashlander outcasts camped near Ald Velothi. Darius wants her back.
Take the Silt Strider from Gnisis to Khuul, then head northwest to Ald Velothi. Ask around town and the locals will point you to Aidanat Camp, southwest of town on a hill past a lit tree — one yurt, a campfire, and two guards outside. The guards will tell you to speak to their leader inside.
The man you want is Abassel Asserbassalit. Raise his disposition and he'll agree to release Madura for a ransom of 500 gold. You can also skip the negotiation entirely and take the violent route — and if you do, Madura will actually join the fight. Just be aware that it possible that Madura Seran can die if you take the violent route. If you're not sure if you can keep her alive, pay the ransom and move on.
Once she's free, escort Madura back to the Ald Velothi Outpost to complete the quest.
Reward: None
Rescue Ragash gra-Shuzgub
The town's tax collector, Ragash gra-Shuzgub, went to collect taxes from the Telvanni wizard Baladas Demnevanni at his tower Arvs-Drelen — and didn't come back. Given that we're talking about a Telvanni wizard, this is not entirely surprising.
Arvs-Drelen is in the northwest part of Gnisis. Head inside, turn right, and go downstairs. After dealing with a couple of rats, you'll find Ragash in a prison cell. The key to free her isn't nearby — head back up the stairs, turn right into a small bedroom, clear another rat, and pick up the key. That opens a door further up the tower, where you'll find Baladas with his pet daedroth and steam centurion — both non-hostile, so don't panic.
Here's the important part: do not kill Baladas. He shows up again in both the main quest and the Telvanni questline, and killing him now locks you out of those arcs permanently. Instead, raise his disposition above 60 through bribing or persuasion and ask him to release the tax collector. He'll hand over the cell key without a fight.
Free Ragash, escort her outside the tower, and you're done. One odd footnote: after you reload or sleep, Ragash vanishes from Morrowind entirely. The game just sort of... stops tracking her. Bit of a loose end, but it doesn't affect the quest.
Reward: None — but you advance to Agent rank (Imperial Steel Helmet + Gauntlets)
Talos Cult Conspiracy
Darius's best quest, and probably the most interesting thing happening in Gnisis. He's heard that some of his own legionnaires are involved with the Talos Cult, which is allegedly plotting against the Emperor. He wants you to find out what they're up to.
Start by speaking to any Imperial Guard with a disposition of 70 or higher and asking about the Talos Cult — they'll point you to a man named Oritius Maro in the Legion barracks. Find him at the entrance to the barracks and raise his disposition to 75 before asking about the cult. He'll play dumb at first, but get him warmed up enough and he'll invite you to join. Accept, take the key, and head down to the storage room. Through the trapdoor you'll find another cult member, Arius Rulician, and a Talos shrine. The evidence you need is in the chest on the altar.
The moment you pick it up, Arius attacks. Deal with him, then head upstairs where Oritius is waiting for a fight too. It's a little surreal — two soldiers brawling in the middle of a Legion barracks while everyone else just ignores it. Take them both out and return the evidence to Darius.
Reward: Promotion to Champion (Imperial Steel Pauldrons + Boots)
That's the end of Darius's quests. He'll tell you he has nothing more for you — head to Ald'ruhn and Buckmoth Legion Fort to continue.
Dwemer Artifacts Drinar Varyon
Imsin the Dreamer commands Buckmoth Legion Fort just south of Ald'ruhn. Her first job: find proof that a man named Drinar Varyon is smuggling Dwemer artifacts through Ald'ruhn.
His house is on the northern end of town. Head inside — the door is unlocked. Look carefully at the large table near Drinar and you'll spot a Dwemer tube sitting among other items. Take it and leave — touching anything else will likely start a fight. Return the tube to Imsin.
One note: if you've already done the Hlaalu quest "Shipment of Ebony," Drinar may already be in jail. The quest still completes fine.
Reward: None
Rescue Joncis Dalomax
A fellow Legion knight named Joncis Dalomax is being held prisoner in the Daedric shrine of Ashurninibi, northwest of Hla Oad on the west coast. Imsin wants you to get him out.
Don't underestimate this one. The enemies guarding Joncis are considerably tougher than you'd expect at this stage — come prepared. The easiest route to Hla Oad is by boat from Vivec. From there, follow the coast northwest until you see a makeshift bridge; the shrine is nearby.
Outside the shrine you'll find a couple of orcs. If your Personality is decent they won't attack on sight, which is useful — one of them is actually a skill trainer. One orc up the steps is level 18 in full orcish gear, so don't get complacent if he turns hostile.Inside, fight your way through, and find Joncis. He says he can make it back safely by himself. Return to Imsin to complete the quest.
Warning: Be careful if you try to loot the daedra heart from the shrine.
Reward: None
Maiden's Token
A Telvanni outcast named Varona Nelas is using an embroidered glove to blackmail a Buoyant Armiger. Imsin wants you to recover it.
Varona is hiding in the cave of Assumanu on the south shore of a long island northeast of Khuul. Assumanu can be tricky to find — if you're having trouble locating it, the video at the top of this guide covers the route in full. Once inside, you can kill Varona or persuade her to hand over the glove. Return it to Imsin to complete the quest.
Reward: None
Imsin has no more quests after this. Head to Balmora and Fort Moonmoth
Missable item
Full Master Alchemy Set
You can find a full master alchemy set on the table next to Varona. It is not owned by anybody so feel free to take it.
Scrap Metal
Radd Hard-Heart commands the Moonmoth Legion Fort just outside Balmora. His first task: settle a challenge from the Buoyant Armigers, who have bet the Legion they can bring back the skin of a corprus beast. Radd's counter: scrap metal from a Dwemer centurion.
The shortcut here is simple. Head to the alchemist Nalcarya in Balmora and buy scrap metal from her for 20 gold. Any scrap metal counts — the game doesn't check where it came from. Hand it over to Radd and collect 500 gold. Easiest quest in the questline by some margin.
Reward: 500 gold
Rescue Jocien Ancois
A priest named Jocien Ancois went out to the Erabenimsun Ashlander camp to teach Imperial culture and values, and got himself captured for his trouble. He's now being held by a Mabrigash witch woman named Zennammu somewhere in Molag Amur.
The Erabenimsun camp will already be marked on your map once Radd gives you this quest. The fastest way to the camp is to run there from Sadrith Mora. Head there, speak to the villagers, and you'll learn that Jocien ran off after Zennammu on his own. Head west out of the camp and run past a cave and over a small hill. Here you will find a page to a book. Follow the trail of book pages west from the camp and you'll find her hut.
Zennammu will release Jocien, but she wants a trade: bring her the hunter Assaba-Bentus from the Erabenimsun camp. Find him back at camp, question his bravery, accuse him of being afraid — he'll take the bait and follow you back. Deliver him to Zennammu, she releases Jocien, and the quest is done.
Reward: None
Rescue Dandsa
An Imperial citizen named Dandsa has been taken by raiders and is being held in a cave called Abernanit on a small island southwest of Gnaar Mok.
The quickest route: take the boat from Vivec to Hla Oad, then the ferry on to Gnaar Mok. From the Gnaar Mok docks, swim southwest to the island and head for the entrance to Abernanit. The bandits inside aren't particularly tough. Work your way through, find Dandsa, tell her to follow you, and escort her outside to complete the quest.
Reward: None — but you advance to Knight Bachelor rank (Imperial Templar Helmet + Bracers)
Breeding Netch
Two netch are breeding just outside Gnaar Mok and causing trouble. Radd wants them dealt with. Head northeast out of Gnaar Mok, cross the makeshift bridge, and go directly north. You'll find the pair — a bull and a betty. These are the specific ones the quest wants, so don't wander off killing random netch elsewhere. You'll get a quest update for each one you kill.
Reward: None
Sorkvild the Raven
A necromancer named Sorkvild the Raven is living in a Dwemer tower on the edge of Dagon Fel and making the local Dark Elves uncomfortable. Necromancy isn't actually illegal under Imperial law, but the Legion wants him gone anyway. Radd sends you to handle it.
Getting to Dagon Fel takes a bit of travel: Silt Strider to Ald'ruhn, another to Khuul, then a boat from Khuul to Dagon Fel. Ask any villager about Sorkvild when you arrive — they'll confirm the tower is on the eastern side of town.
Head inside ready for a fight. The first enemy you meet on the ground floor is the strongest fight in the entire tower — don't underestimate him. He's carrying a full set of bonemold armor if you want it. A mage around the corner has a robe with spell absorption and the First Barrier ring. Further in, another guard is carrying the Saint's Black Sword — a short blade with Ebony-level damage and a solid enchant, worth around 12,500 gold. Don't leave without it. Sorkvild himself is on the second floor. If your level is low, don't try to tank his spells — keep moving and close the distance fast.
Reward: No formal quest reward — but the tower loot more than compensates
Radd has no more quests after this. Head to Ebonheart and the Hawkmoth Legion Garrison.
Missable item
Masque of Clavicus Vile
Location: On Sorkvild's corpse on the second floor. Daedric-tier armor rating with a constant Fortify Personality 30 enchantment. One of the best helmets in the game. Do not leave this tower without looting it.
Courtesy
Frald the White commands the Hawkmoth Legion Garrison in Ebonheart. He wanders the garrison so check both floors if you don't spot him immediately.
His first task is an unusual one. A Buoyant Armiger named Salyn Sarethi at Ghostgate has been telling people the Imperial Legion has no courtesy, wit, or honor. Frald wants you to prove him wrong — not with a sword, but through a riddle contest.
Head to Ghostgate. From Ald'ruhn, follow the road southeast past Buckmoth Legion Fort, then continue east until you see the glowing blue gate. At the fork, turn left for the Tower of Dusk. Salyn is on the lower level.
If your Intelligence is below 50, pick up The Red Book of Riddles from the bookseller Codus Callonus on the northwest side of Ald'ruhn before you go. If you're above 50, head straight there.
The riddle contest has three questions. The answer is always the third option. Answer correctly all three times, and Salyn will concede that the Legion may have some courtesy after all.
Reward: The Second Seed (Speechcraft skill book) + promotion to Knight Protector (Templar Pauldrons + Boots)
Honthjolf is a Traitor
A former legionnaire named Honthjolf deserted and is now working as a guard for Daedra worshippers at a cave called Aharnabi — far east of the map, east of Molag Mar, near Azura's Shrine.
Route: boat from Ebonheart to Tel Branora, another to Molag Amur, then run directly east. You'll pass Azura's statue and see a small body of water — run straight across it and you'll find Aharnabi.
Before you go in: bring restore strength potions. Multiple bonewalkers inside will drain your Strength, and if it hits zero you won't be able to move. Honthjolf himself is in the northeast corner of the cave.
Reward: None
Suryn Athones' Slanders
An Ordinator named Suryn Athones in Vivec has been spreading lies about the Order of Ebonheart. Frald wants him silenced permanently.
Head to the Hall of Justice in Vivec's Temple Canton. Inside, go straight then turn left — Suryn's office is right there. Here's where it gets tricky: you cannot attack him first. Doing so gives you a bounty, and if you're a member of the Tribunal Temple, you'll be expelled. You need him to attack you.
Your options are to keep asking him about "slander" until he snaps, taunt him through the dialogue wheel, or cast a Fury spell on him. After spending five minutes trying to taunt Suryn manually, I'd strongly recommend the Fury spell if your Illusion is decent — it's much faster. Once he attacks, fight back and finish it.
He's not a pushover — probably the toughest individual fight in the questline up to this point. Loot everything off him; Ordinator armor sells for a lot even if you don't use medium armor.
Reward: None (Ordinator armor loot makes up for it)
Saprius Entius
A Legion knight named Saprius Entius has been accused of murder, and Frald doesn't trust the Ordinators to give him a fair trial. He wants you to find Saprius and get him off the island.
One critical thing before you start: if you currently have a bounty, Frald will not give you this quest. Clear any outstanding bounty first. Saprius is hiding in the canal works section of the Arena Canton in Vivec.
Head to the arena, go inside, and make your way down to the canal works. Through the storage section, turn right, and you'll find Saprius tucked in a closet. The moment you speak with him, two Ordinators attack. This is probably the hardest fight in the entire questline — two Ordinators at once. Hold your ground and take both of them out. Loot all the Ordinator armor from their bodies before moving on.
After the fight, speak with Saprius again and ask him to travel with you. Getting him out of Vivec means taking the sewers — dive into the water, exit through the grate into the waterways outside, and swim to the mainland shore. Stay away from any Ordinators on the way out. If one spots you, they turn permanently hostile. Take the ferry back to Ebonheart and return to Hawkmoth Legion Fort.
Reward: Helm of Graff the White (constant 10% Reflect — Heavy Armor)
Frald's quests are done. It's time to seek out Varus Vantinius. You need to be at least Knight Protector rank to access his quests.
The Lord's Mail
Varus Vantinius is the Knight of the Imperial Dragon — the highest-ranking Legion officer in all of Vvardenfell — and he's in the Grand Council Chambers in Ebonheart. Finding him takes a moment the first time: he's tucked away in a staircase off to the side, wearing a distinctive set of silver armor.
He has two tasks for you. The first: recover the Lord's Mail, a legendary Legion artifact that was recently stolen from the Imperial Commission shrine. Varus gives you a key to begin the investigation.
Head to the lower level of the Commission to find the shrine, guarded by two soldiers. Use Varus's key to get inside. The armor is gone, but there's a hidden door in the wall. To find out who opened it, head back upstairs and speak with Rufinus Alleius — he tells you that a recently banished legionnaire named Furius Acilius used to talk about the armor and about secret passages under the castle.
Go to the guard garrison and check Furius's old bunk — downstairs on the left. Look under the pillow and you'll find a key. That opens the hidden door back in the shrine. Head through into the cave below, deal with a couple of rats, and follow the passage to a makeshift campsite where Furius is hiding. As soon as you speak with him, he attacks — be ready.
Loot his corpse carefully. Take the Lord's Mail, the Demon Katana (bound longsword cast-on-use enchant), and the two potions of rising force — you'll need those in a moment. Use one of the rising force potions to float up to the ledge above the campsite. There's a Glass Frost Sword up there, and on top of a rock —
Missable item
Pilgrim's Lantern
Location: On top of a rock on the ledge above Furius's campsite. Only accessible using the rising force potion looted from Furius. Burns for 68 years — it will never go out during any normal Morrowind playthrough. Easy to miss because it just looks like a piece of furniture sitting on a rock.
Return the Lord's Mail to Varus. He's grateful and gives you the cuirass off his own back — the Duke's Guard Silver Cuirass. It also counts as a valid Legion uniform, which is useful.
Reward: Duke's Guard Silver Cuirass + promotion to Knight of the Garland
Chrysamere
Varus has one more task. There are rumors that a legendary blade called Chrysamere — the Paladin's Sword — is in the possession of a sorceress near Sadrith Mora. He wants it back.
Take the ferry from Ebonheart directly to Sadrith Mora. From the docks, run southeast — you'll need water walking to cross to the island where the cave is located, so bring a spell or potion. Head south-southwest across the water, past the rock formations, toward a giant mushroom in the distance. The island has a cave called Abanabi. That's your destination.
Inside: leveled Daedra through the corridors, a sorcerer who summons a bonewalker (bring those restore strength potions), and at the end the sorceress herself on a makeshift bridge over water. Fight her carefully. If her body falls into the water when she dies, looting Chrysamere off her corpse becomes a nightmare. Position yourself so she can't slide off the edge when she goes down.
Chrysamere has a damage range of 5 to 70. The enchantment is average, but that raw damage ceiling is extraordinary. It's worth 95,000 gold and it hits like it.
Return to Varus and hand over the sword. You have to give it up for now — but not for long.
Reward: Promotion to Knight of the Garland (if not already achieved via Lord's Mail quest)
Grandmaster Duel
After you return Chrysamere, Varus lays out the situation plainly. There can only be one Knight of the Imperial Dragon in all of Vvardenfell. He's not stepping down. If you want the rank, you'll have to take it from him — in a duel to the death at the arena in Vivec.
Head to the arena. The moment you step inside, Varus attacks. There's no conversation, no ceremony. Beat him, and when it's done, loot his corpse. Chrysamere is there. So is the Lord's Mail. Two legendary artifacts, both yours.
Reward: Chrysamere, Lord's Mail, rank of Knight of the Imperial Dragon
Unique Rewards & Notable Loot
Chrysamere — The Paladin's Sword. Two-handed longsword with a damage range of 5–70. The upper end of that range is exceptional. Worth 95,000 gold. Carried by the sorceress in Abanabi, handed to Varus, then looted back from Varus in the Grandmaster Duel.
Lord's Mail — Legendary cuirass, one of the best heavy armor pieces in the game. Counts as a valid Legion uniform. Recovered from Furius Acilius in the cave below the Imperial Commission, briefly handed to Varus, then looted from his body after the duel.
Masque of Clavicus Vile — Daedric-tier helmet with constant Fortify Personality 30. Found on Sorkvild the Raven in Dagon Fel. One of the best helmets in the game and completely missable if you don't know it's there.
Helm of Graff the White — Heavy Armor helmet with constant 10% Reflect. A personal gift from Frald the White after the Saprius Entius escort quest. Not announced in advance — Frald just gives it to you as thanks.
Pilgrim's Lantern — Unique lantern that burns for 68 years. Found on a ledge in the cave under the Imperial Commission, accessible only with the rising force potion from Furius Acilius's corpse. Practically eternal light source for your entire playthrough.
Saint's Black Sword — Short blade with Ebony-level damage and a solid enchant. Found on a guard inside Sorkvild's tower. Worth around 12,500 gold if you're selling.
Tips & Build Notes
This questline is best for combat builds. The favoured skills — Long Blade, Blunt Weapon, Spear, Heavy Armour, Block — are all combat-oriented, and the two major artifact rewards (Chrysamere and Lord's Mail) are both combat items. Magic-primary and stealth builds can still complete it, but you'll feel more at home here if you're swinging something.
The uniform is non-negotiable. Keep a Legion cuirass in your inventory at all times. If you misplace the one Darius gives you, any Imperial fort has replacements. This is the single most common thing that causes people to get stuck with no idea why — Legion members just refuse to talk to them.
Do the questline at a low level if you want the gear to matter. The armor upgrades you receive through rank advancements are solid early-game equipment. If you come in at high level, you'll already have better gear and the promotions feel like a formality. The questline is more satisfying when the Imperial Steel set is an actual upgrade.
Buy scrap metal from Nalcarya in Balmora for 20 gold. Saves you a trip to Arkngthand and 20 minutes of your life.
Bring restore strength potions to Aharnabi and Abanabi. Both locations have enemies that drain Strength. Getting stuck unable to move far from civilization is not a fun situation.
Clear your bounty before starting the Saprius Entius quest. Frald flat-out refuses to give you this quest if you have an outstanding bounty. It's easy to forget, especially if you're running multiple faction questlines simultaneously.
Don't kill Baladas Demnevanni. He appears later in the main quest and Telvanni questline. Killing him here causes problems you won't notice until much later.